Anviz - How to import/export users from device and Crosschex standards using USB flash drive
Anviz: How to Import and Export Users Using a USB Flash Drive
Introduction
You can transfer user information between an Anviz biometric device and CrossChex Standard using a USB flash drive. This guide explains how to export users from either source and import them into the other.
Requirements
An Anviz biometric device (the Anviz C2 Pro is used in this guide).
A USB flash drive. A 4 GB drive is used in this example. Drives smaller than 16 GB may be compatible. Kingston and SanDisk are examples of brands that may work.
A computer with CrossChex Standard installed, if you are transferring users to or from the software.
Important: Make sure the USB flash drive contains the exported user data before attempting to import it.
1. Export Users from an Anviz Device to a USB Flash Drive
Purpose: Save the user information stored on the biometric device to a USB flash drive.
Step 1: Connect the USB Flash Drive
Insert the USB flash drive into the USB port on the Anviz device.
Step 2: Open the Main Menu
Log in using an administrator account.
The default credentials listed in the original guide are:
User ID:
0Password:
12345
Step 3: Select the User Export Option
From the main menu, navigate to:
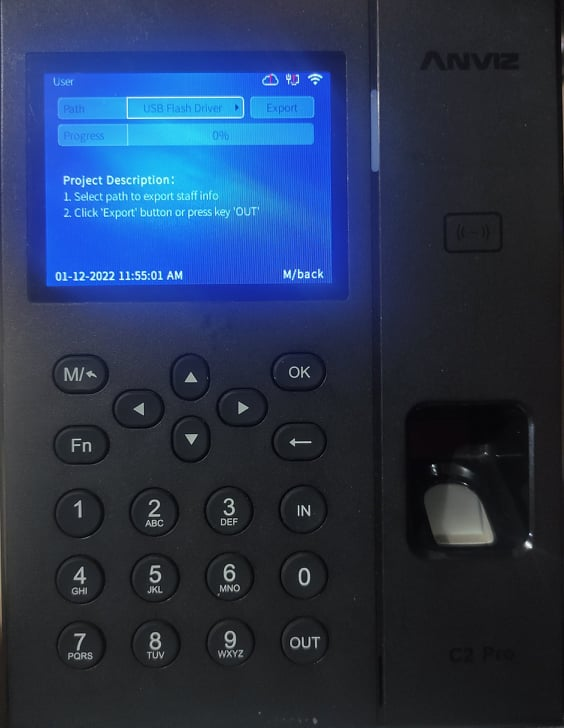
Data > Export > User
Step 4: Confirm the Export
Press OK to start exporting the user information to the USB flash drive. Wait for the operation to finish.
2. Export Users from CrossChex Standard to a USB Flash Drive
Purpose: Back up the user information stored in CrossChex Standard to a USB flash drive.
Step 1: Open CrossChex Standard
Launch the software on your computer and log in using your account.
The original guide lists the default username as ADMIN. The default password is blank only.
Step 2: Connect the USB Flash Drive
Insert the USB flash drive into an available USB port on your computer.
Step 3: Open the User Backup Option
In CrossChex Standard, navigate to:
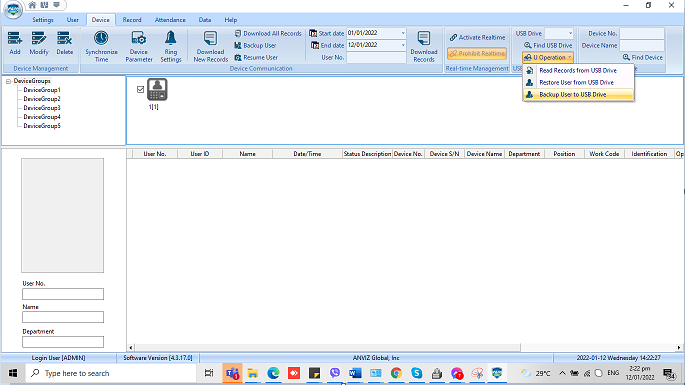
Device > U operation > Back up user to USB Drive
Step 4: Complete the Backup
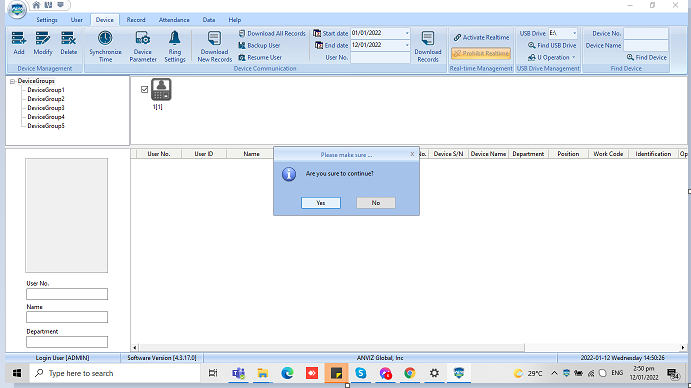
Follow the prompts displayed by the software and wait for the backup process to finish.
Step 5: Close the Window
Click Close after the operation is complete.
The USB flash drive now contains the exported user information, ready to be imported into a compatible Anviz device or CrossChex Standard installation.
3. Import Users into an Anviz Device from a USB Flash Drive
Purpose: Transfer previously exported user information from a USB flash drive to an Anviz biometric device.
Step 1: Connect the USB Flash Drive
Insert the USB flash drive containing the exported user information into the Anviz device.
Step 2: Open the Main Menu
Log in using an administrator account.
The default credentials listed in the original guide are:
User ID:
0Password:
12345
Step 3: Select the Import Option
From the main menu, navigate to:
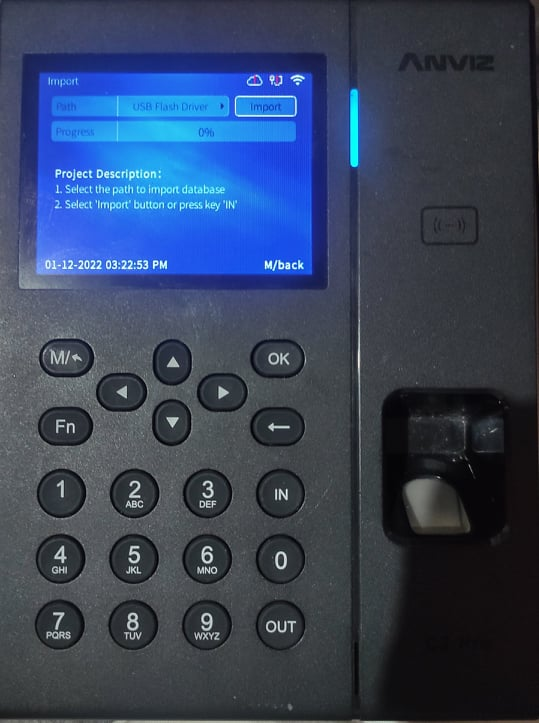
Data > Import
Step 4: Confirm the Import
Press OK to start importing the user information from the USB flash drive. Wait for the process to finish.
Step 5: Verify the Imported Users
Check the device's user list to confirm that the expected user information is available.
4. Import Users into CrossChex Standard from a USB Flash Drive
Purpose: Restore user information from a USB flash drive into CrossChex Standard.
Step 1: Open CrossChex Standard
Launch the software on your computer and log in.
The original guide lists the default username as ADMIN. The default password is blank only.
Step 2: Connect the USB Flash Drive
Insert the USB flash drive containing the exported user information into your computer.
Step 3: Open the User Restore Option
In CrossChex Standard, navigate to:
Device > U operation > Restore user from USB Drive
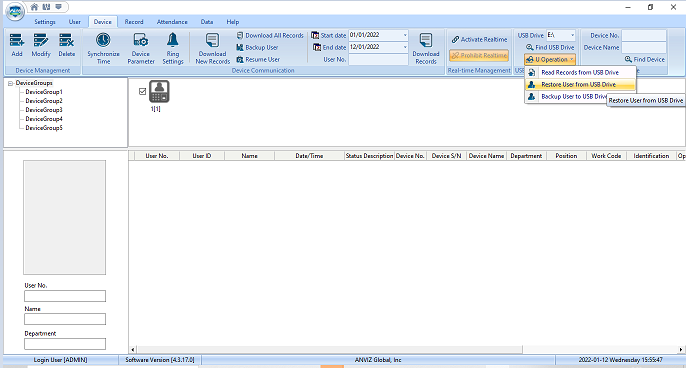
Step 4: Confirm the Restore Operation
When the software detects the exported user information on the USB flash drive, a confirmation prompt will appear.
Click Yes to proceed.
Step 5: Wait for the Process to Finish
Allow CrossChex Standard to complete the restoration.
Step 6: Close the Window
Click Close once the operation is complete.
Step 7: Verify the Imported Users
Open the user list in CrossChex Standard and check that the expected user information has been restored.
Quick Reference
|
| |||
|
| |||
|
| |||
|
| |||
|
|
Important Notes
Use a USB flash drive that is compatible with your Anviz device. The original guide recommends trying a drive smaller than 16 GB.
Make sure the correct exported user data is available on the USB flash drive before starting an import or restore operation.
Menu names and available options may vary depending on the device model or software version.
The default credentials listed in this guide are taken from the original document. For security, change default passwords where applicable and use authorized administrator credentials.
The original guide does not specify the default CrossChex Standard password or explain whether importing users will overwrite existing records. Confirm these details before proceeding if existing user data must be preserved.