Allow Cardexchange to Windows Firewall
1. Open Windows Defender Firewall with Advanced Security
2. Select New Rule..
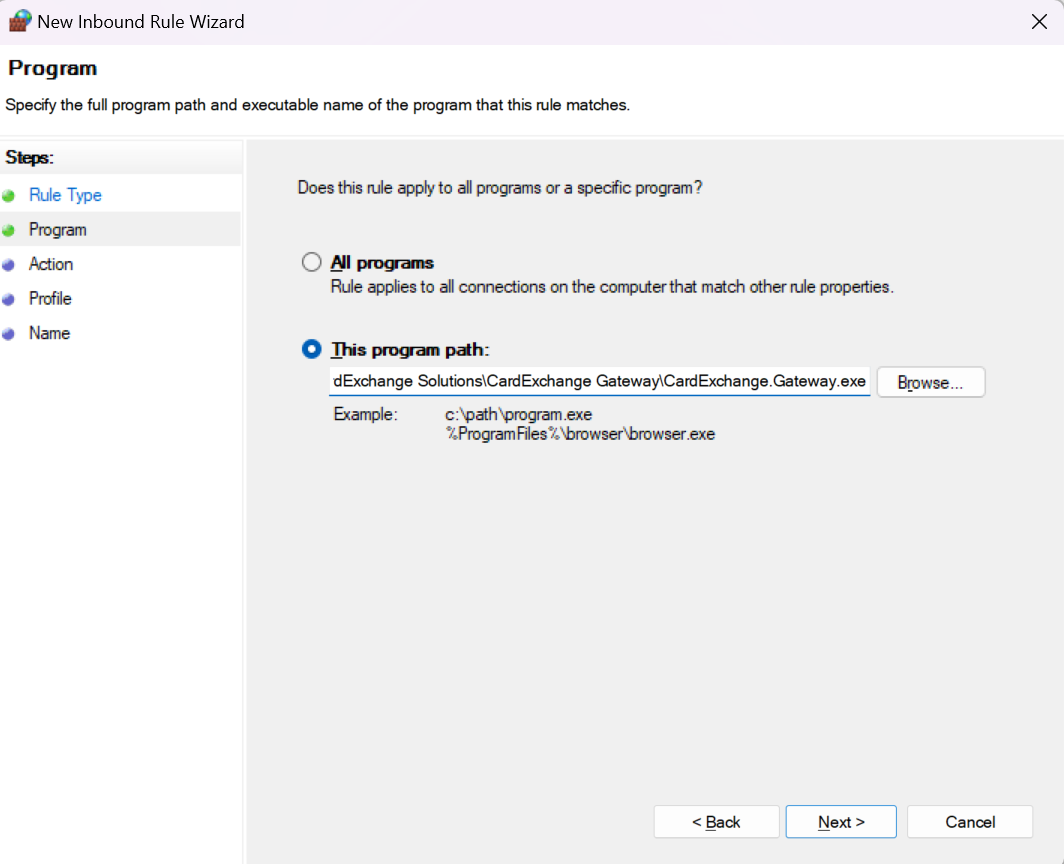
3. Select Program and click Next..
4. Input this link to the textbox. C:\Program Files (x86)\CardExchange Solutions\CardExchange Gateway\CardExchange.Gateway.exe
5. Select Allow the Connection..
6. Select Domain, Private and Public then click Next..
7. Name the Rule "Allow CardExchange" then click Finish.
Related Articles
How to enable CardExchange for all Windows Users
Upon Installation there will be a prompt to install the application to the current user or to all windows users. Selecting Anyone who uses this computer (all users) All users will be given access to CardExchange and it's license. CardExchange folder ...Compatible Cameras to CardExchange
Please visit https://cardexchange.support/resource/supported-devices for more details.How CardExchange dongle works
How to activate Cardexchange with dongle: https://support.ccs.com.ph/portal/en/kb/articles/how-to-activate-cardexchange-license-with-dongle After License activation, you can copy the license file with filename "lservrc" in ...Cardexchange hangs when printing
Please try to update your Cardexchange to the latest version. You can download the latest version on this link : https://cardexchangeid.com/support/resources/downloads Look for CardExchange Producer The image below is the latest version as of ...CardExchange Installation and Activation Guide
1. Install CardExchange. (Latest version can be downloaded here https://cardexchangeid.com/support/resources/downloads) If Microsoft Access Database Engine is not installed to your computer, a prompt to install will pop up. This process requires ...